Headless Configuration Instructions
These instructions will guide you through the steps on how to connect to your Raspberry Pi using something called a headless configuration. Instead of connecting separate IO devices to our Raspberry Pi (like a keyboard or mouse), we are going to connect the Raspberry Pi to a laptop. This enables us to interact with our Raspberry Pi using the monitor, keyboard and mouse of the laptop! Pretty cool, huh?
To use this configuration, you will need the following:
- A laptop running Windows 7 or later
- An SD card reader (several laptops come with one built-in)
- An ethernet port, or a USB-to-ethernet dongle
- A crossover cable (also called an ethernet cord)
- A microUSB to USB cable.
To connect to the Raspberry Pi in this manner, we need to install some additional programs on our laptop:
Install supporting software on your laptop (Windows)
To enable us to use our laptop to connec to the Pi, we need a way to remotely connect to it. To do so, we will be using something called Secure Shell (SSH). SSH will allow us to connect to the Raspberry Pi via a Ethernet cable connected between the Raspberry Pi and your laptop. To use SSH, we will use a program called PuTTY. Keep in mind that PuTTY is only necessary if you are using Windows.
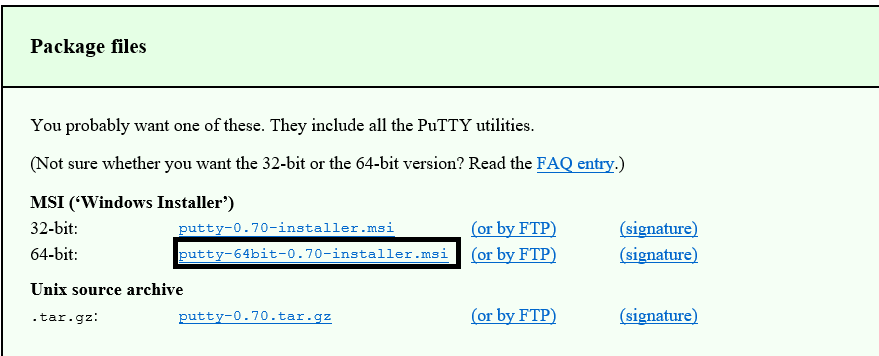
- Download and install PuTTY (found here https://www.chiark.greenend.org.uk/~sgtatham/putty/latest.html)
- Download and install VNC Viewer (found here https://www.realvnc.com/en/connect/download/vnc/viewer)
- Navigate to Network and Sharing Center (press Windows key and search for Network and Sharing Center)
- On the right menu go to
Change adapter settings. Right click onEthernet -> Properties.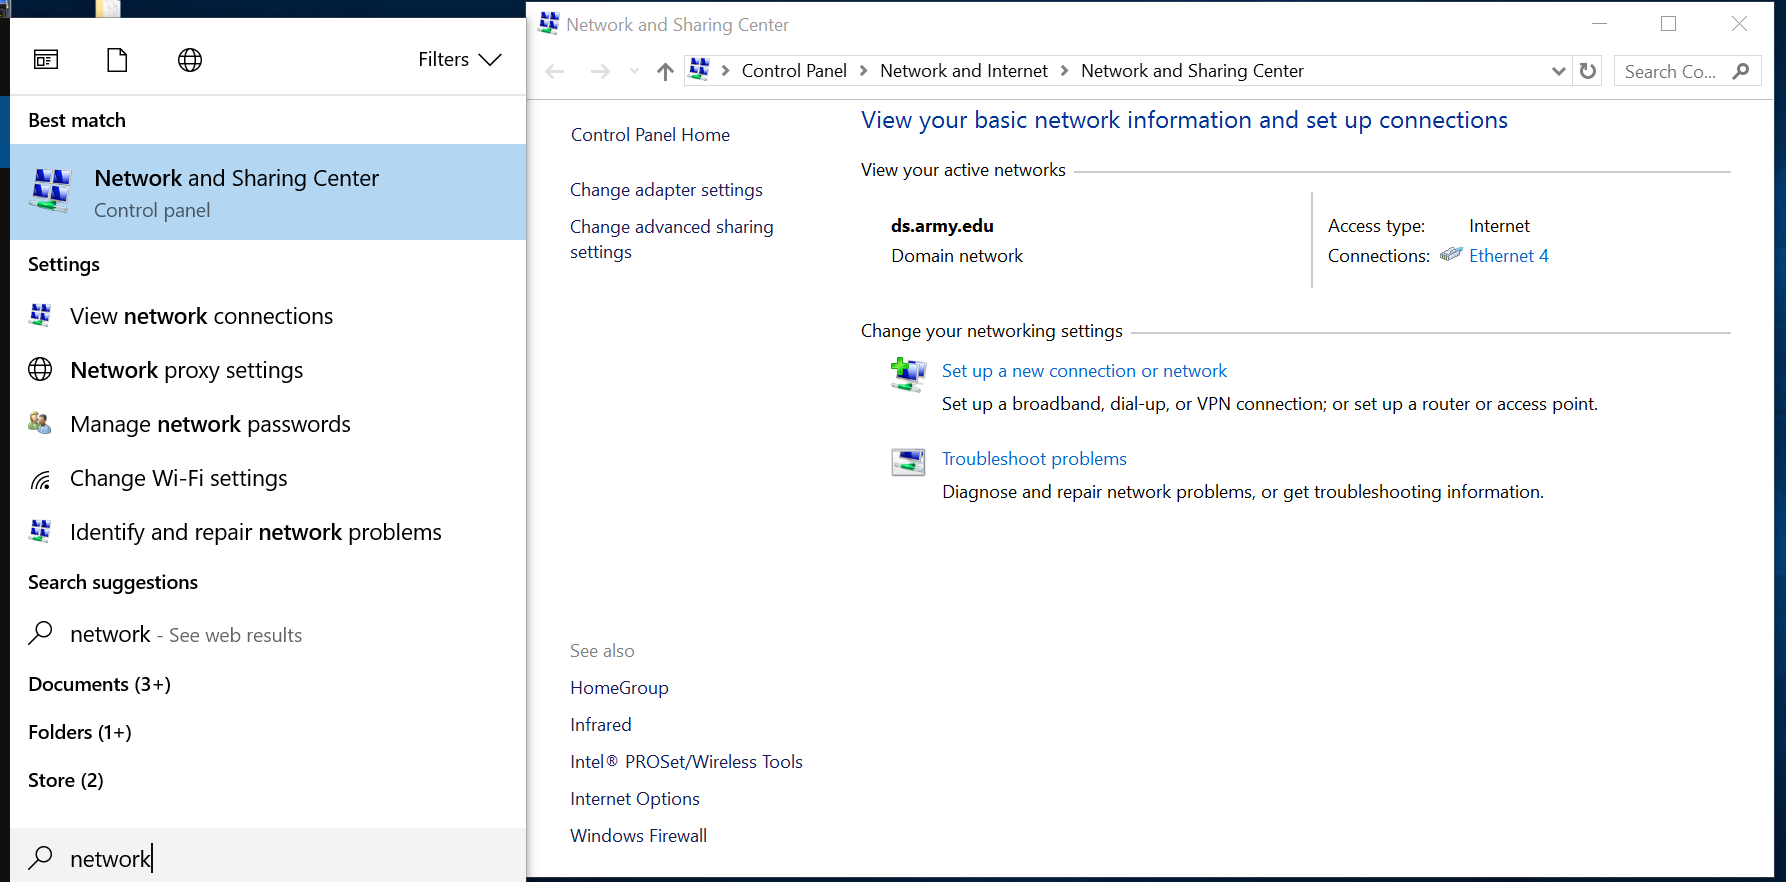
- Click on
Internet Protocol Version 4 -> properties. On the pop-up window, selectUse the following IP address. For the IP address type10.0.0.2and for the Subnet Mask255.0.0.0. Leave everything else blank.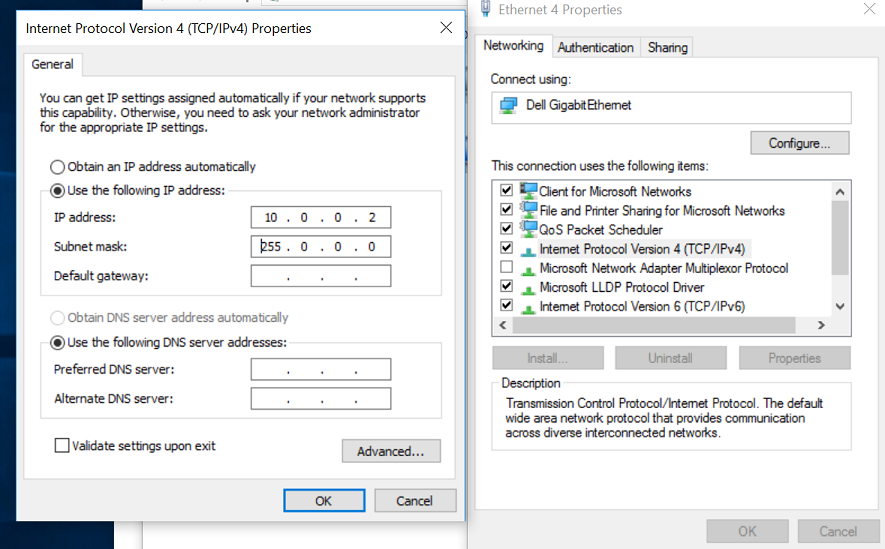
- Check the box that say
Validate the settings upon exit. ClickOKand then click theXon the upper right hand side of the window to close it. - Keep in mind that if you regularly connect to the Internet using a Ethernet cable, you will not have
access to internet anymore. When you are done working with the Raspberry Pi, follow steps 4 and 5 and
select
obtain IP address automatically. This will bring back the iternet to what it was before.
Connect all your cables
Now that we have installed the additional software on our laptop, we are ready to access the Pi! Let's start by connecting our cables. You will need: a microUSB to USB cable (same cable used to charge a phone), and a crossover (or Patch) ethernet cable.
- Make sure your laptop is on and that the Pi starts out turned off.
- Connect the Ethernet cable from the Pi to your laptop's Ethernet port.
- Plug in the microUSB power cable into your Pi. Connect the USB end into your laptop. This will supply power to your Raspberry Pi.
Access your Raspberry Pi!
Now it's time for the moment of truth! We get to boot up our machine! Do the following:
- Open
PuTTY.exe. You should find this in Local DiskC -> Program Files -> Putty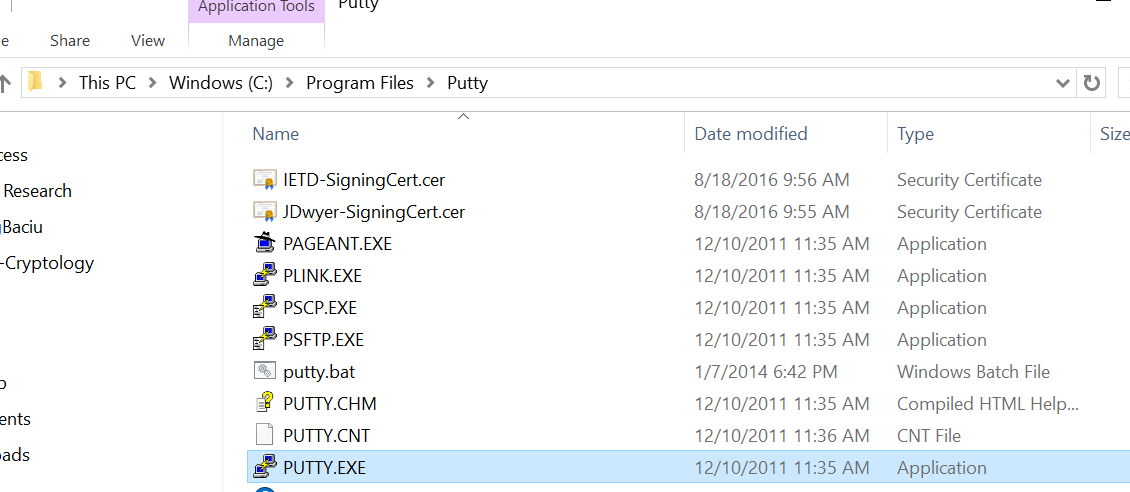
- In the Host Name box, write
10.0.0.3and in theSaved SessionswriteRaspberryPi. PressSaveand thenOpen.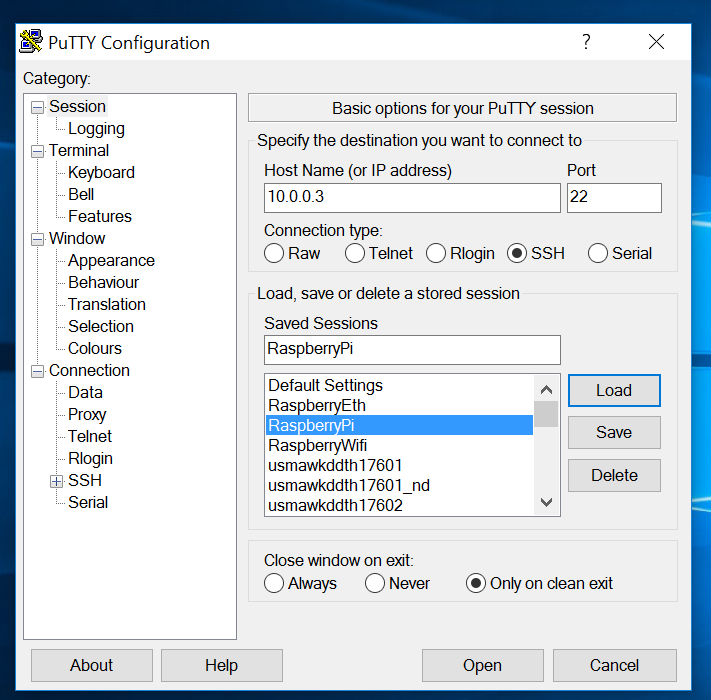
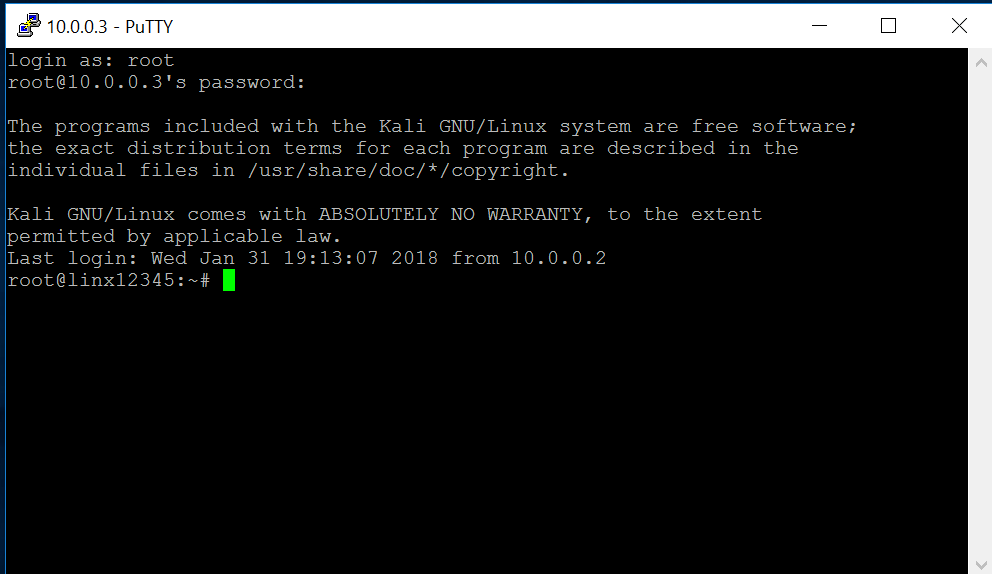
- A black window should pop up and ask for a user name and password. (Username: root Password: toor). If a security alert shows up, select Yes.
- If this works, pat yourself on the back. You are now connected to the RaspberryPi via the Command Line!
Hooray! While you can do all of our exercises in this interface, let's get a Desktop interface for now.
- In this window, type
bash startvnc.shand pressEnter. Go ahead and minimize the window if you wish. DO NOT CLOSE IT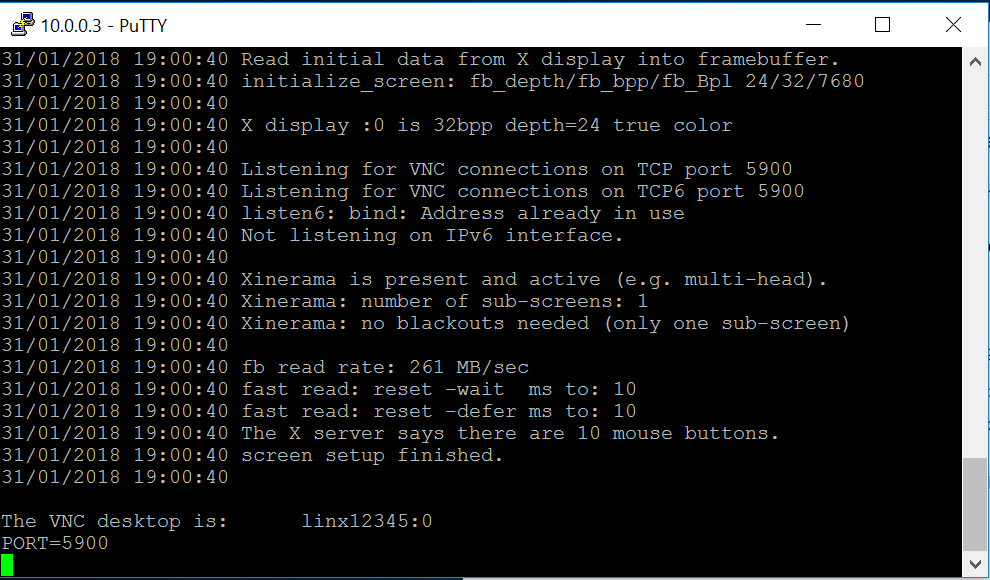
- Press the windows key and search for VNC viewer and open it. Once it opens, go to
File -> New Connection. - In the VNC server box write
10.0.0.3:5900and in the Name box write a name for your RaspberryPi. PressOK.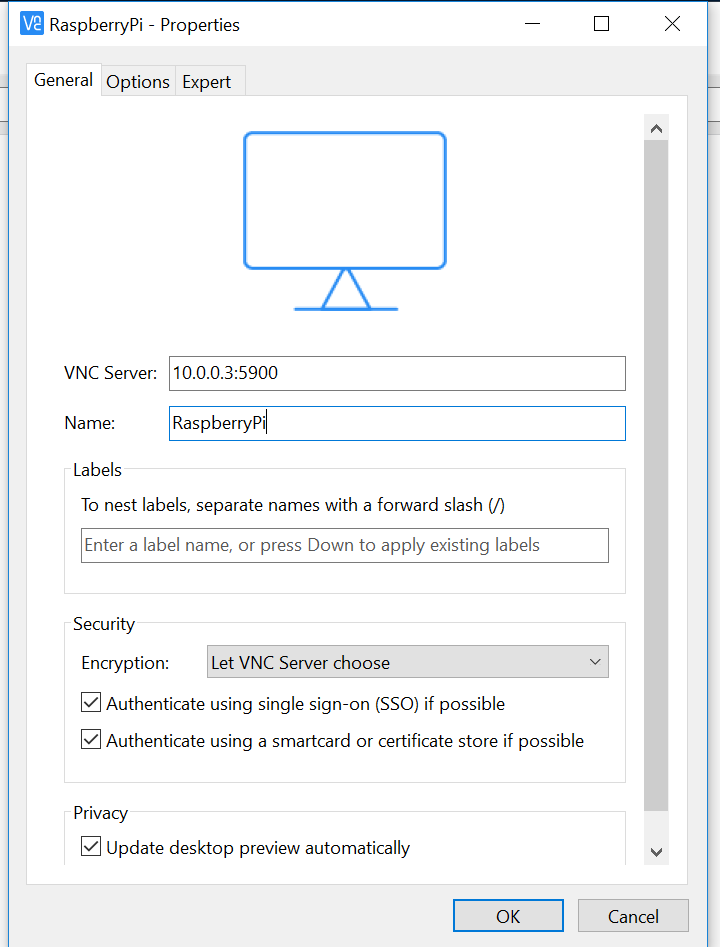
- You should see an icon with the chosen name. Double click on it.
- Next, you will be asked for a username and password. Use the same ones from step 3.
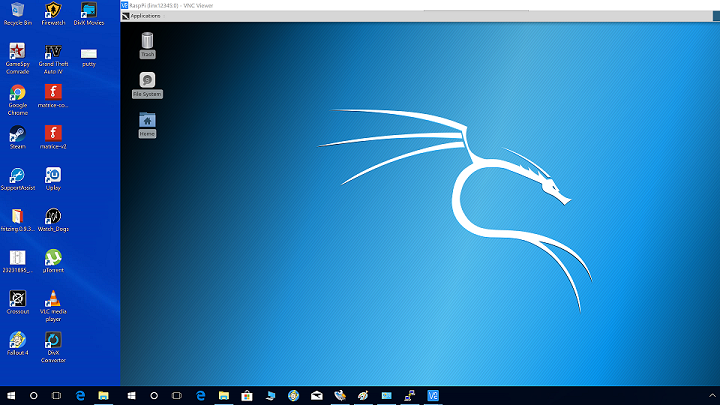
If everything worked as planned, you should now see a Desktop pop up, just like a normal computer. Great job! If you have a wireless connection nearby you can connect it to internet and start navigating.
Going forward: Every time you want to access your RasperryPi, you have to open PuTTY, click on Raspberry, Load and Open. Repeat steps 3-5. Open VNC viewer and follow step 9.
Troubleshooting
Q: I don't have a windows laptop. I have a macbook. Can I still use the Raspberry Pi?
A: Absolutely! You don't need to install Putty, but go ahead and install OpenVNC. To connect to your
laptop using using your macbook, open up the Terminal application, and type in the command:
ssh root@10.0.0.3. Make sure that you connect your Ethernet cable to your Pi and laptop and power it up
first though!
Q: My laptop doesn't have an Ethernet port! What do I do?
A: A lot of modern laptops are getting rid of the Ethernet port. Not to worry though -- you can connect to the Rapsberry Pi using a USB to Ethernet dongle. Some dongles require that you install a driver to get it to work. Make sure that you install any needed drivers. If you run into issues, ask your teacher or a parent for help.
Q: When I try to connect using PuTTY, I get an error that says "Refused Connection" what do I do?
A: Open up a command window and type ipconfig. If your IP address does not show up as 10.0.0.2, that
means that your network configuration isn't right. Ensure that your Ethernet cable is connected to your
computer and the lights on the Ethernet port is flashing. If this doesn't work, try unplugging the
power cable to your Pi, and reconnecting it. This is called "power-cycling". Usually, power cycling is
sufficient.
Q: I don't see any Ethernet lights when I try to connect to my Pi!
A: Is your Pi powered on? If so, what color is the light? If the light is red, that means that there might be something wrong with your microSD card. Try reimaging the card by redoing the steps in the "Preparing the MicroSD card" section.
If the LED is green, but you still aren't seeing any lights on the Ethernet port, check the Ethernet cable. You may need a crossover or patch cable. This is different from the standard Ethernet cable, since crossover cables are used to connect to computers together.